

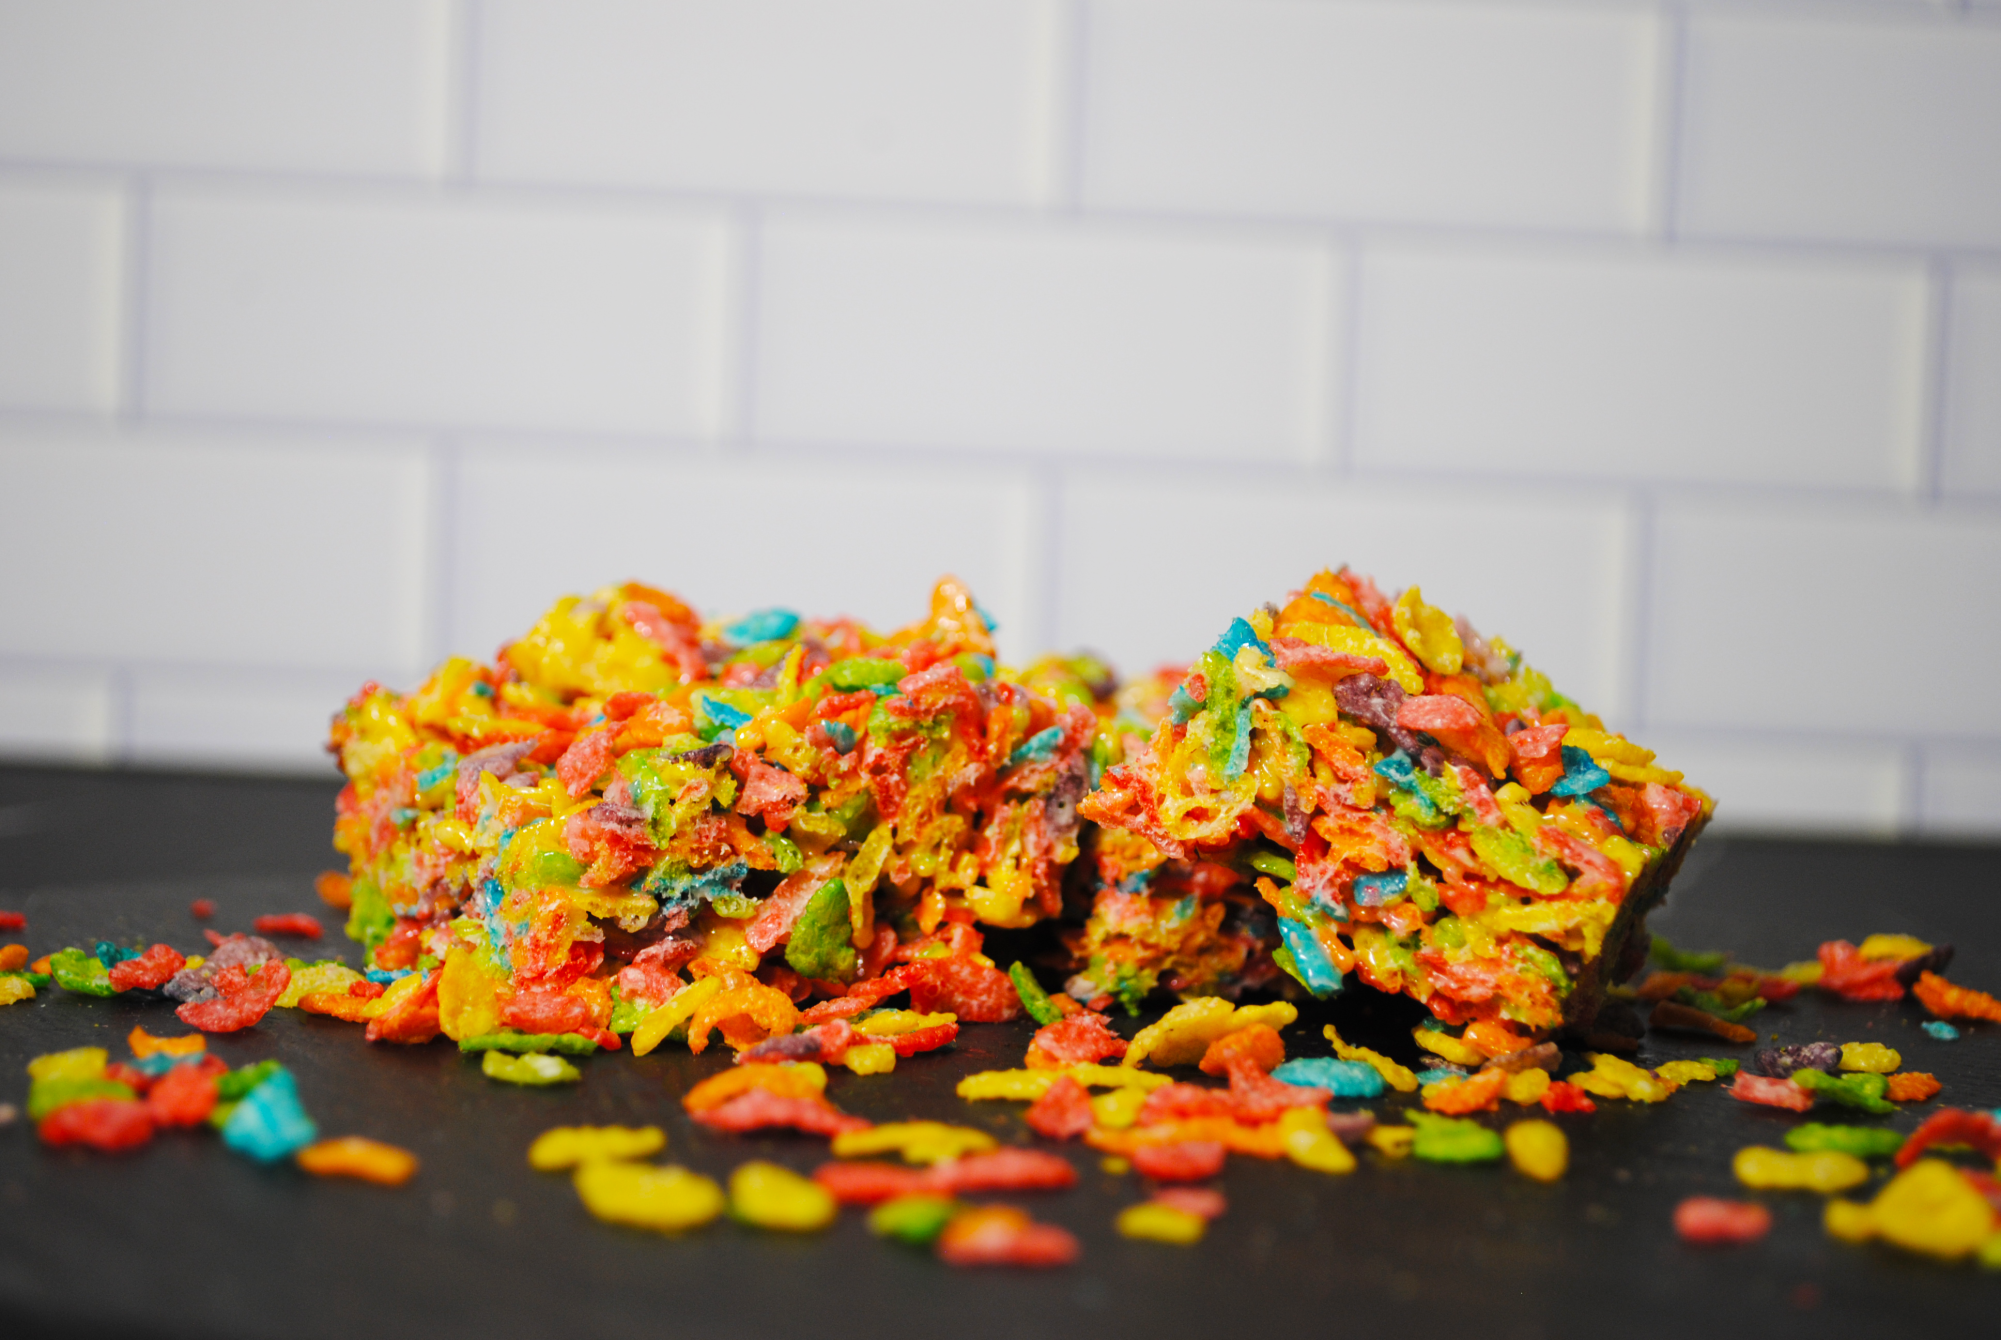
Fruity Pebble Rice Krispy Treats
INGREDIENTS/TOOLS:
- Four Tablespoons of Butter
- 10 Ounces of Marshmallows
- Six Cups of Fruity Pebbles Cereal
- Cooking Spray
- Pan of Choice
- Large Cooking Pot
- Plastic Spatula
- A Cutting Knife
DIRECTIONS:
In a pan of choice, lightly grease with cooking spray. Set your pan aside, get a reasonably large pot, and put it on medium-low heat. Then, gently stir your four tablespoons of butter with a plastic spatula.
As your butter is melting, measure out 10 ounces of marshmallows and wait until your butter is completely melted. Once your butter is a golden yellow liquid, add your marshmallows and stir. While that is combining, measure out six cups of Fruity Pebbles and set to the side.
When the marshmallows are completely melted and combined evenly with the butter, turn your heat to low and slowly pour in your cereal. Gently stir in your Fruity Pebbles to not crush them too much. When combined with the buttery marshmallowy goodness, turn off the heat and pour into your greased baking dish.
Use your rubber spatula to scrape the sides of the pan to get all of the rice krispies out and into your container. To safely press your treats into the pan, run your hands under cold water and delicately press them into the shape of your pan. Be careful not to press too hard, or they will turn out like bricks when cool.
Wait roughly 30 minutes to an hour for them to cool, then cut and enjoy your fruity treats! You can make these treats with any type of cereal if you’re creative!
Spring Dipped Oreos
INGREDIENTS/TOOLS:
- One Package of Oreos
- Four Ounces of Vanilla Almond Bark
- Sprinkles of Choice
- Baking Sheet
- Parchment Paper
- Microwave Safe Bowl
- Plastic Spatula
- A Fork
DIRECTIONS:
Lay out your Oreos on a baking sheet covered with parchment paper. Grab a microwave-safe bowl and place your almond bark in said bowl. Microwave in 30-second intervals, stirring with a rubber spatula until the almond bark completely melts and no lumps are present.
Take a fork and gently place it between the cream of the Oreo and dip it halfway into the melted almond bark. Before it dries, add your sprinkles of choice and put them on your parchment paper. Repeat for as many Oreos as you want.
If your almond bark begins to harden in the bowl, stick it back in the microwave for 30 seconds. Let your dipped Oreos cool for roughly 20 minutes, then chow down on your beautiful and tasty spring treats!

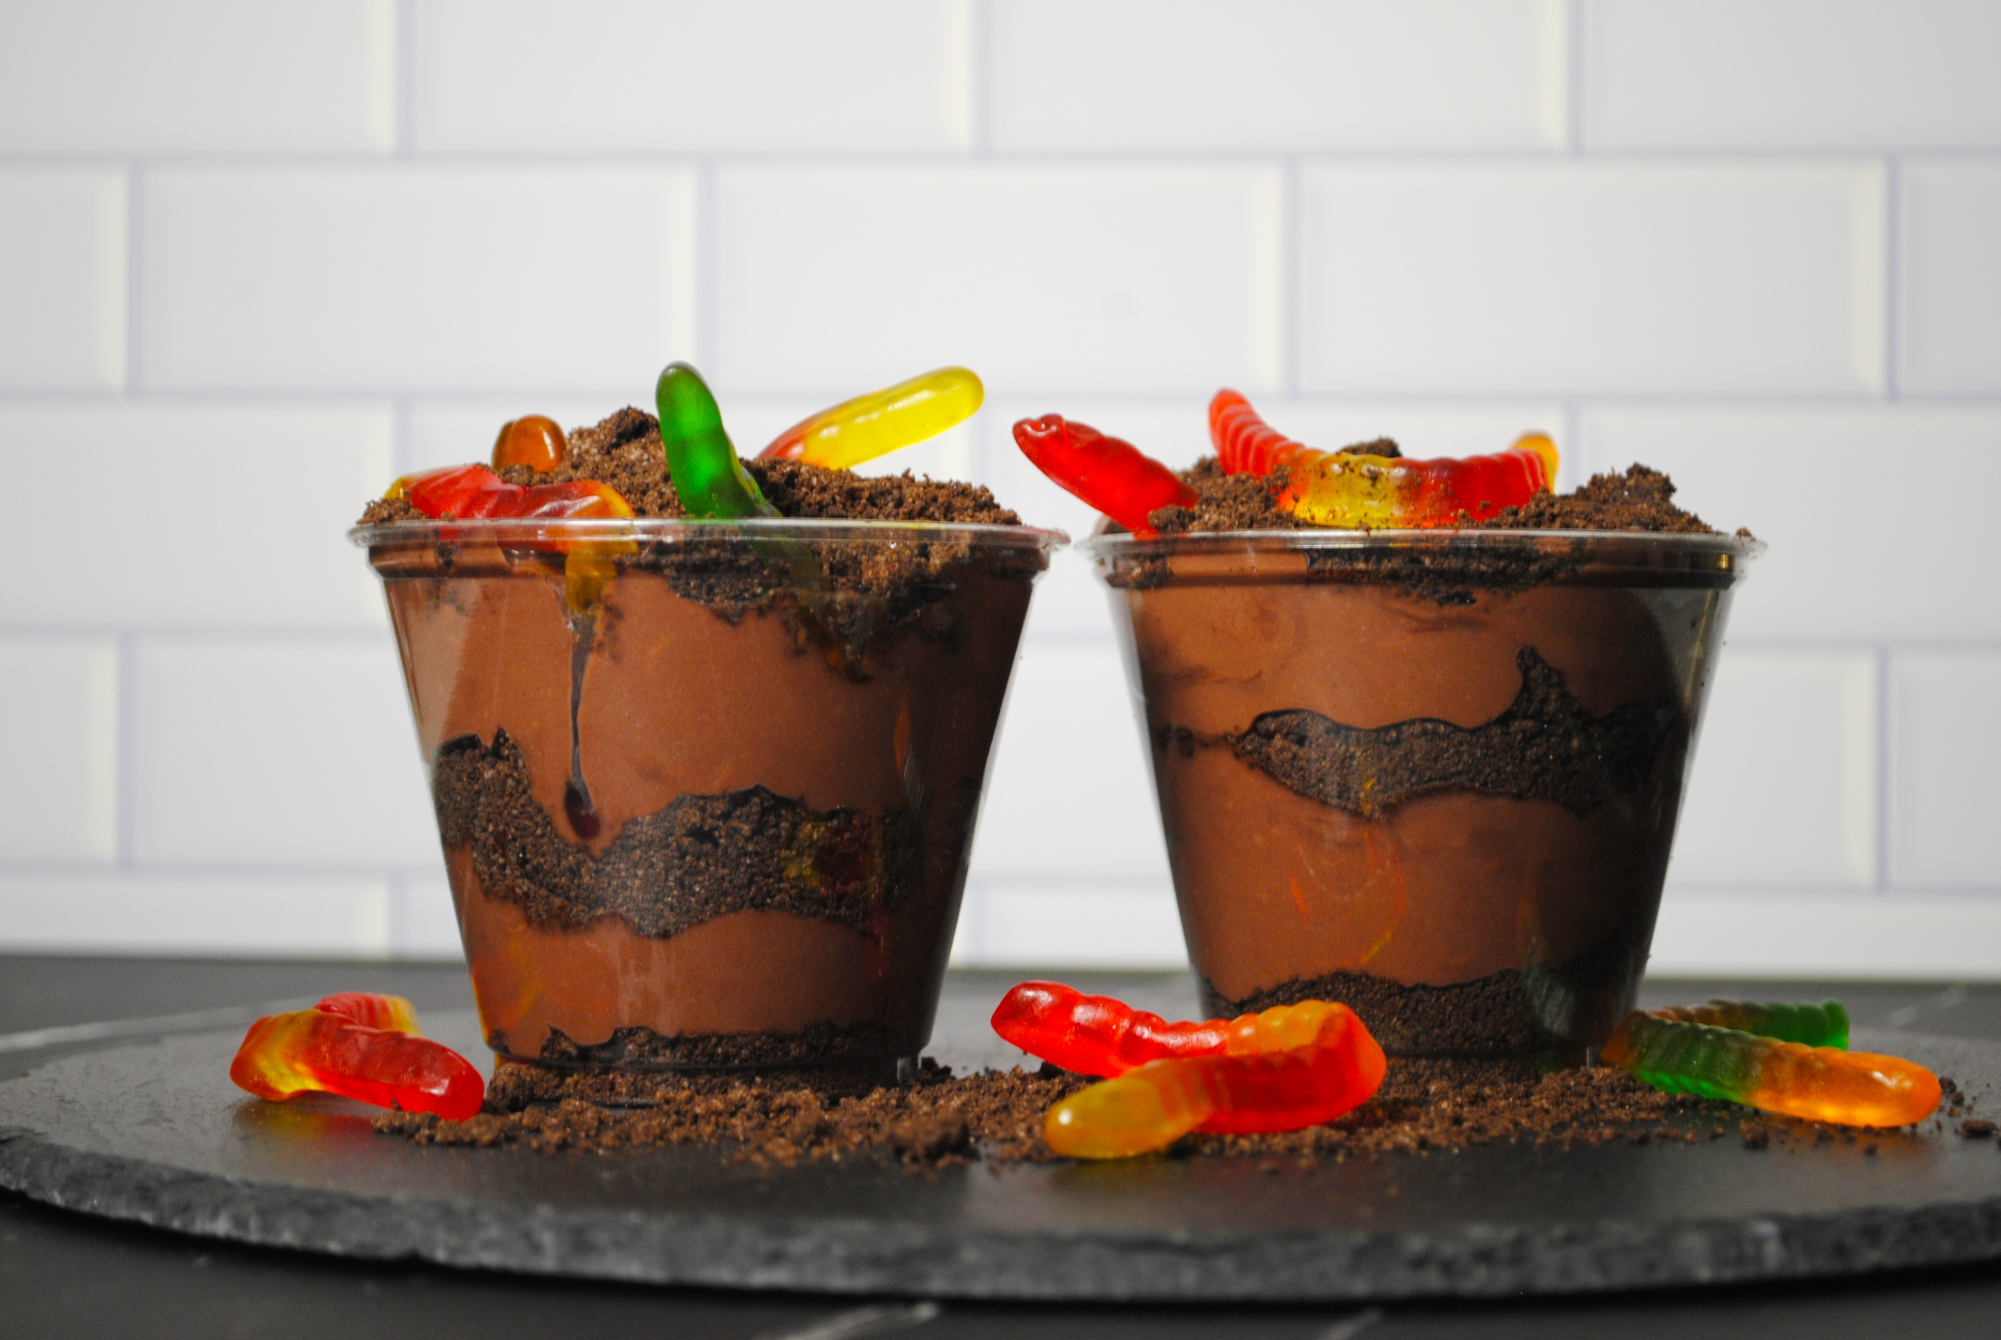
Dirt Worm Cups
INGREDIENTS/TOOLS:
- One Box Instant Chocolate Pudding Mix
- Two Cups of Cold Milk
- Eight Ounce Container of Cool Whip
- 10 to 12 Crushed Oreos
- A Bag of Gummy Worms
- Mixing Bowl
- Hand Mixer
- Plastic Bag
- Plastic Spatula
- Clear Cups/Containers
DIRECTIONS:
Combine your box of instant chocolate pudding mix in a mixing bowl and two cups of cold milk. Take your hand mixer and mix on medium speed for two minutes or until evenly combined. Then, place in the fridge for roughly 10 minutes or more.
While your pudding is in the fridge, place your 10 to 12 Oreos in a plastic bag. Take your anger out on them by crushing them until they resemble dirt and set to the side. Once your pudding is set up, take your container of Cool Whip and fold it until it is well combined.
Take some clear containers or cups and layer your crushed Oreos and pudding mixture in whatever fashion you want. Once done, place your dirt cups in the fridge for 20 minutes to thoroughly chill. Once ready to serve, take your gummy worms and sporadically put them in your dirt cups.
Now it’s time to dig in and enjoy a fun dessert from your childhood! If you’re feeling fancy, add some flower candies to make it seem more realistic.